How to make natural rangoli colors at home from household items for Diwali
Read more
Aaj Tak
www.aajtak.in

How to make natural rangoli colors at home from household items for Diwali

Creating rangoli is considered a very auspicious event on Diwali, so people decorate the entrances and rooms of their homes. Although markets offer expensive rangoli colors during Diwali, there is no need to buy them in a store; you can prepare natural dyes from ingredients already at home, and this does not take much time.

Rangoli color packets can cost around 100–200 rupees during festivals, which sometimes discourages people from making rangoli. However, now you can use homemade ingredients to prepare colors that will be very beneficial and will not cause any side effects on the skin. Below is a simple way to prepare such colors that will not require additional expenses.

How to make rangoli colors:

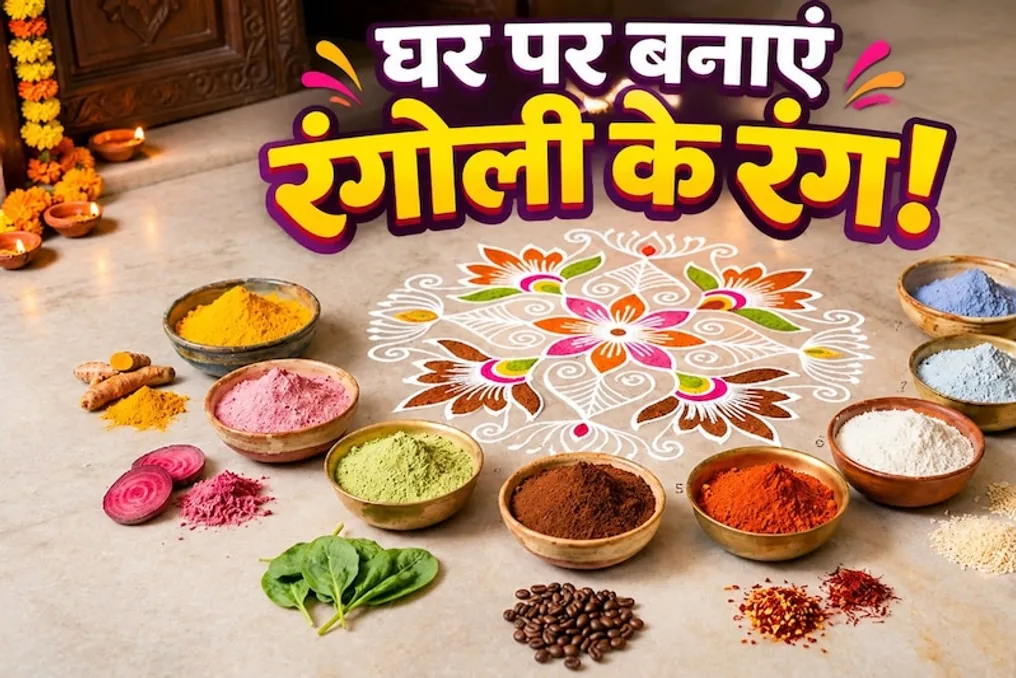
Yellow color from turmeric

The yellow shade looks very beautiful in rangoli. To obtain it, you will need turmeric available in the kitchen. Take turmeric powder into a bowl and mix it with a small amount of rice flour or wheat flour. This will lighten the color of the turmeric and allow you to get a sufficient amount of powder for creating rangoli. You can also add a little gram flour (besan).

Pink color from beetroot

If you want to get a pink or light red color for rangoli, beetroot is suitable. You need to grate the beetroot and squeeze out the juice. Then gradually mix this juice with rice flour. After that, thoroughly dry the mixture, remove lumps, and strain it. As a result, you will get a pink powder. It is important to ensure that it is completely dry before using it in rangoli.

Green color from spinach

To create green color, you can use spinach leaves. Wash the spinach thoroughly and squeeze out the juice. Then mix this juice with rice flour and dry it well in the sun. After drying, strain the mixture to get a light green color. Alternatively, for a green shade, you can use finely ground dried leaves.

Brown color from coffee

Coffee powder is a good alternative for coloring rangoli brown. Add a little rice flour or wheat flour to the coffee powder to increase the volume of the color and simplify the process of creating rangoli. To get lighter or darker brown shades, you can vary the ratio of coffee to flour.

Saffron/Red color from kumkum

If you need saffron or red color for rangoli, you can use kumkum kept at home. It can be mixed with rice flour to get a light shade. In this case, you should use kumkum that is safe for skin contact and does not contain harmful chemicals.

White color from rice flour

White color is used in rangoli to highlight patterns, and for this, you do not need to buy anything from the store. You can use rice flour or finely ground rice that you have at home. Strain it before use so that the patterns are clean.

Blue color from Aparajita flowers

To get blue color, you can use Aparajita flowers. Dry the flowers, grind them into powder, and then mix them with rice flour. This may give a light blue shade, but due to its natural origin, the color may not be bright.


Important points when making rangoli colors

Similar stories

Chandrakala Recipe: Homemade Sweet with Mawa for Diwali Festival
Read more
www.aajtak.in

Chandrakala Recipe: Homemade Sweet with Mawa for Diwali Festival

During the Diwali festival, there is an inevitable desire to fill the home with the aromas of sweets. If you prefer to cook something special at home instead of buying ready-made items from the store, you can prepare Chandrakala sweet.

Chandrakala, a traditional dessert of North India, resembles Gujiya in appearance, but its taste and method of preparation give it a unique quality. Inside this sweet is a filling made of mawa, almonds, cashews, raisins, and coconut. After frying in ghee, it is dipped in a syrup flavored with saffron and cardamom. This sweet, crispy on the outside and soft on the inside, will appeal to everyone, from children to adults. Below is a simple instruction for its preparation.

How to make Chandrakala sweet:

Preparing the filling:

First, you need to prepare the filling. Heat ghee in a pan, then lightly fry chopped almonds, cashews, grated coconut, and raisins. Next, add mawa and mix all ingredients thoroughly, cooking them. When the mixture becomes homogeneous, turn off the heat and let the mixture cool aside.

Kneading the dough for Chandrakala:

In a large bowl, mix flour, ghee, baking powder, and salt. Then, gradually adding a little water, knead a stiff and smooth dough. Cover the dough and leave it for about 20 minutes.

Shaping the Chandrakala:

Next, form small balls from the dough and roll them into round patties. Place the prepared mawa and dried fruit filling onto one round patty. Apply a little water around the edges and place the second round patty on top. Press the edges carefully so that the filling does not leak out during frying.

Frying in ghee:

Heat ghee or oil in a pan. Fry the finished Chandrakalas over medium heat until golden and crispy. It is important not to fry them over high heat, otherwise, they will quickly brown on the outside but not cook through inside.

Making the saffron syrup:

In another vessel, heat sugar and water, bringing it to the consistency of a single-thread syrup. Then, add cardamom powder and saffron strands, mixing well.

Dipping in syrup:

The finished, fried Chandrakalas are dipped into the hot syrup and left there for about two to three minutes. After that, they are taken out. This results in a delicious Chandrakala sweet that can be served to guests on Diwali.

How to make colorful rasgullas at home from milk, avoiding expensive store-bought sweets
Read more
www.aajtak.in

How to make colorful rasgullas at home from milk, avoiding expensive store-bought sweets

With the arrival of the holiday season, many different sweets appear in homes. Although you have probably tried white rasgullas, having colorful and fluffy rasgullas on the festive table will delight everyone, from children to adults.

Commercial colorful sweets often contain harmful chemicals and dyes, which negatively affect health. Therefore, it is recommended to make rasgullas at home using fresh milk to obtain pure chhana and coloring them with natural dyes to get safe and fluffy treats. The simplest instructions and secret tips for preparation are presented below.

For preparation, you will need: 2 liters of whole milk (for making chhana), 3-4 tablespoons of lemon juice or vinegar, 3-4 cups of sugar (for syrup), 4-5 cups of water, a few drops of natural food coloring (light pink, yellow, or green), as well as cardamom powder or kewra water for flavoring.

The main secret to getting soft rasgullas lies in the technique of kneading the chhana: it must be kneaded with the back of your hand for at least 7-8 minutes until smooth. The correct stage for adding color is as follows: after thoroughly kneading the chhana, it is divided into 2-3 parts, and 1-2 drops of different natural food colorings are added to each of these parts, mixing gently so that the color is evenly distributed when forming the balls.

First, 2 liters of milk are brought to a boil, and then curdled using lemon juice. The curdled milk is strained through cheesecloth and rinsed with clean water to remove acidity. Excess moisture from the chhana is squeezed out and placed on a plate, then kneaded by hand for 7-8 minutes until it becomes smooth like butter.

Next, the smooth chhana is divided into portions, the desired natural color (pink, yellow, green) is added, and small, smooth balls are formed. In a large, wide pot, 3-4 cups of sugar are heated together with 4-5 cups of water until boiling. When the syrup boils vigorously, the colorful rasgulla balls are dropped into it one by one. The pot is covered with a lid and cooked over medium or medium-high heat for 12-15 minutes. You will see the rasgullas increase in size, becoming twice their original volume.

After this, turn off the heat and let the rasgullas cool completely. After cooling, they are ready to serve.

Ways to remove moss from roofs, balconies, and pots using inexpensive white powder
Read more
www.aajtak.in

Ways to remove moss from roofs, balconies, and pots using inexpensive white powder

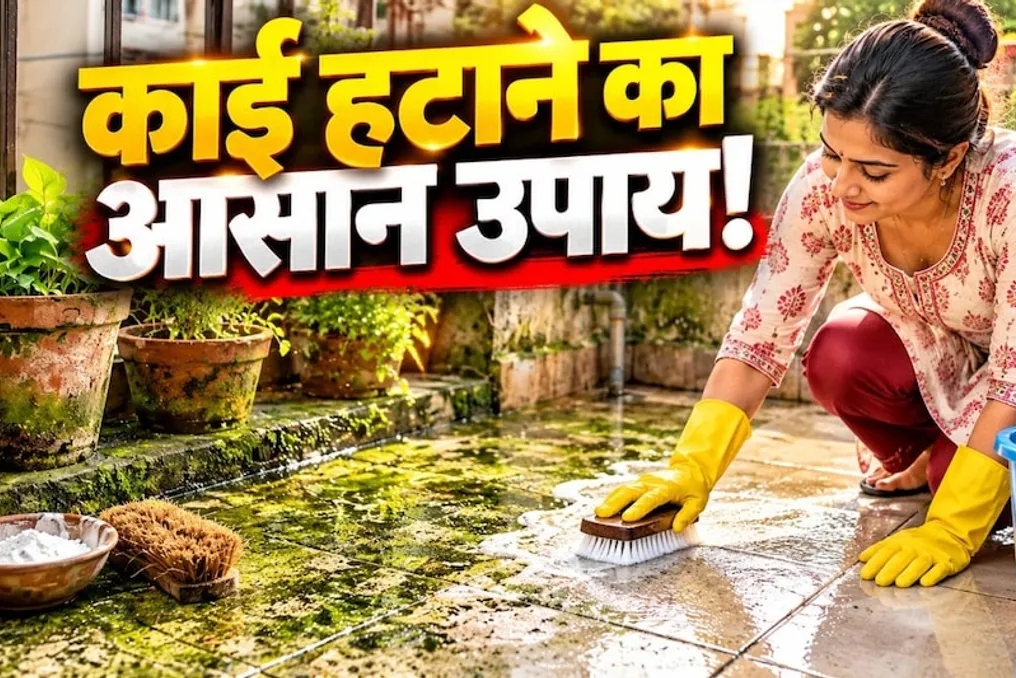
After the end of the rainy season and the onset of light cold, preparations begin for Diwali celebrations in homes, and much time is spent cleaning roofs and balconies. Due to rain, moss forms on roofs, around tanks, balconies, walls, and pots, which is difficult to remove. This not only worsens the appearance but also increases the risk of slipping and falling on the roof.

If moss appears on your house, it can be cleaned this season. Since the rains are stopping, the moss does not grow as quickly, allowing it to be easily removed for a long-lasting result. After the rainy season, no chemical agents or excessive effort are required to remove moss.

There is a simple white powder that allows the moss problem to be eliminated in minutes. Next, we will discuss how to use this powder and what precautions should be taken. This white powder will greatly help in quickly getting rid of the moss problem.

Powder useful for removing moss

When moss appears on walls, courtyards, roofs, and pots, it has to be scrubbed hard, but it still remains. However, a folk remedy can solve this problem in minutes. For this, it is enough to purchase this white powder, which costs only 5–10 rupees. It can be bought in the required quantity and is considered very effective for removing moss without requiring large expenses.

Where to find this white powder?

To remove moss from roofs and yards, you can buy white powder in any store, such as a spice shop. Moss thrives in acidic environments, and lime is an alkali. Therefore, when it is sprayed on moss, it destroys its cells and helps prevent its spread.

Lime prevents moss spread

When lime is applied to stubborn green moss, a layer is formed that prevents moisture penetration. Because of this, the moss does not reappear. Therefore, lime is considered the most effective agent against moss because it not only removes it but also prevents re-growth.

Note these points when applying

Before using the lime powder, several important points must be considered, as its application can be dangerous to the eyes and skin. Before applying lime to remove moss, put on gloves and protective goggles. After some time after applying lime to the moss, clean the area with a brush.

Disclaimer: This home method is based on social media claims and general information. Lime can cause irritation to the skin, eyes, and respiratory tract, so caution must be exercised when using it, by wearing gloves and protective goggles. Do not allow direct contact of lime with skin or eyes, and keep it away from children and pets. Be sure to read the instructions on the package before use. Test on a small area before applying to any surface. If the moss is very dense or the surface is slippery, be extremely careful during cleaning.

Popular