Ways to clean stained areas around the sink from ingrained dirt
Read more
Aaj Tak
www.aajtak.in

Ways to clean stained areas around the sink from ingrained dirt

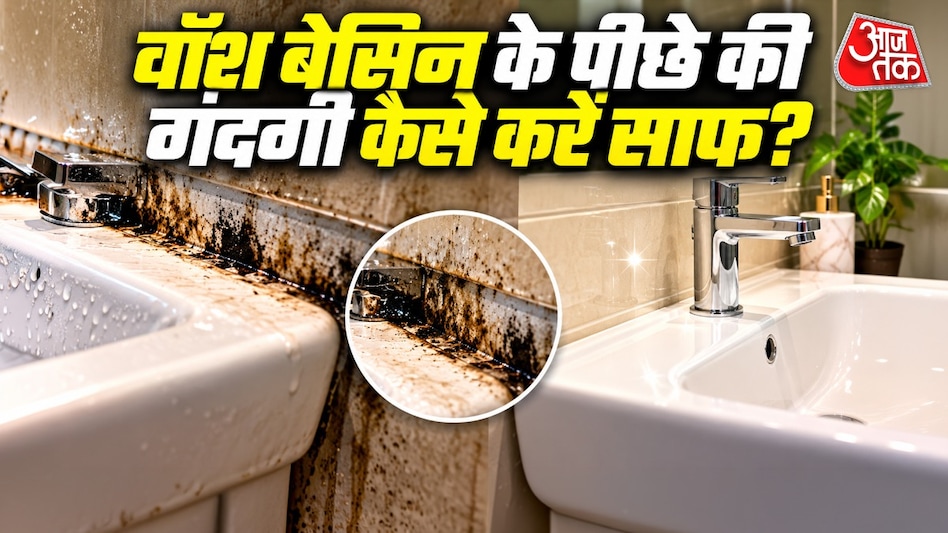
People pay close attention to keeping the bathroom clean, cleaning floors, tiles, faucets, and the sink itself. However, the area behind the sink is often overlooked. Due to constant water splashes, soap usage, and high humidity, a slippery layer, water spots, and black grime gradually accumulate there. Sometimes this dirt becomes so old that it cannot be removed by simple wiping.

Since the space between the sink and the wall is often limited, it can be difficult to reach this area and perform a thorough cleaning. If you are also experiencing a problem with black dirt accumulation behind the sink, do not worry. With simple methods, appropriate products, and a little caution, this hidden corner can be kept clean. Below are simple ways to remove dirt accumulated behind the sink, as well as tips for preventing re-soiling.

First, dry dirt must be removed: before starting the cleaning behind the sink, all items such as bottles, soap dishes, etc., should be removed. Then, dust, hair, and debris should be cleaned with a dry cloth or an old toothbrush. If the distance between the sink and the wall is small, a small brush with a long handle can be used to more easily reach places that a regular cloth cannot reach.

To get rid of stubborn soap residue and water spots behind the sink, prepare a solution by mixing a little liquid dishwashing detergent with warm water. Soak a soft cloth in this solution, wring it out well, and wipe the dirty area. In heavily soiled areas, gently scrub with a brush, avoiding excessive friction to prevent scratching the sink and tiles. After cleaning, remove soap residue with a clean, damp cloth, and then thoroughly dry the area.

If dirt has accumulated behind the sink for a long time and is not removed by regular daily cleaning, you can use a suitable cleaner depending on the material. Before applying the cleaning agent, be sure to test it on a small, inconspicuous area. Use the product strictly according to the instructions on the packaging. It is important to remember that the same cleaner cannot be used for all types of materials; incorrect chemicals can damage sinks with glass, marble, or delicate finishes. Furthermore, never mix bleach with vinegar, acid, or any other cleaning agent, as this can release toxic gases.

Sometimes, black marks appearing behind the sink may not just be dust or soap scum, but mold caused by constant moisture. In such cases, simply wiping the surface is not enough. First, you need to determine the cause of the increased humidity. After cleaning, thoroughly dry this area and ensure ventilation in the bathroom. If black spots reappear repeatedly, or if you notice increased dampness on the wall or water pooling under the sink, you should check the pipe and faucet connections. A constant leak can lead to the re-formation of dirt and mold.

Maintaining cleanliness in the area behind the sink does not require hours of daily work. It is enough to incorporate several simple habits into your routine. It is recommended to clean once a week, wiping the back with a dry or slightly damp cloth. You must prevent water from accumulating behind the sink by removing it immediately. You should also regularly clean the edges of faucets and the sink from soap scum. Special attention should be paid to corners, using small brushes for areas that are difficult to reach with a cloth. After cleaning, it is important to remove moisture with a dry cloth instead of allowing it to evaporate.


Similar stories

Ways to remove burnt and ingrained stains from dishes without damaging the surface
Read more
www.aajtak.in

Ways to remove burnt and ingrained stains from dishes without damaging the surface

Cooking in the kitchen sometimes results in milk burning onto the bottom, or bean or vegetable dishes sticking to the sides of the cookware. Although carelessness is often the cause, cleaning up such stains afterward can be very difficult. Removing black and brown spots requires significant effort because they are very stubborn and do not always disappear after repeated use of detergent and scrapers. Excessive scrubbing can lead to dulling the shine of the dishware itself.

However, there are simple home methods that allow you to easily detach burnt food without expending much effort or time. It is important to know the correct cleaning technique, especially when dealing with expensive or shiny dishes that require special care.

  • Preliminary soaking in soapy solution: If food has stuck to the cookware, you should not start scrubbing immediately. First, allow the cookware to cool completely. Then, fill it with warm water so that the burnt area is submerged. Add a few drops of dish soap and leave it for one hour. If the layer of food is very thick, you can soak the cookware overnight. This will help soften the food. After this, carefully remove the stuck layer using a wooden spoon or silicone spatula, avoiding harsh scrubbing.
  • Removing stubborn black stains with baking soda: If a regular soapy solution is not effective, you can use baking soda, which helps loosen the particles of burnt food. Mix three tablespoons of baking soda with a small amount of water to form a thick paste. Apply this paste to the stained area of the cookware and leave it for 20–30 minutes. Then, gently clean with a soft sponge, trying not to exert excessive force. Finally, rinse the cookware thoroughly. The process can be repeated if necessary.
  • Heating water and baking soda in the cookware: In cases where the food is so strongly adhered to the bottom that it does not come off after soaking and applying paste, you can try the heating method. Pour water into the cookware so that it covers the stained area, add about two tablespoons of baking soda. Place the cookware on the stove and heat slowly for 5–10 minutes, ensuring the water does not boil too vigorously. After turning off the heat, let the water cool. Then, carefully lift the stuck food using a wooden spoon. The warm water and soda can soften the burnt layer, making it easier to remove. Finally, the cookware should be washed with detergent and water.
  • Choosing the right cleaner for old stains: If there are old brown or black marks on the cookware, regular cleaning may not be sufficient. In such situations, it is recommended to use a non-abrasive cleaner chosen according to the surface type. It is especially important to choose a product that will not damage the glossy coating of enameled items. Before using any cleaner, read the instructions on the packaging carefully and perform a test application on an inconspicuous area.
  • Caution when using hydrogen peroxide: Some brown and black stains remain on the cookware for a long time. Although some methods involve mixing baking soda with hydrogen peroxide, keep in mind that this is not suitable for all types of cookware. Therefore, before using hydrogen peroxide, always conduct a test on a small area.

How to avoid damaging the shine of the cookware

When cleaning burnt cookware, you must never use steel wool, metal scrapers, or sharp tools, as this will cause scratches. You should also avoid suddenly pouring cold water onto hot cookware; always let it cool down before starting to clean. Furthermore, it is recommended not to cook for long periods over high heat and to wipe the cookware completely dry immediately after use.

Ways to clean a kitchen hood from grease and smoke without disassembly
Read more
www.aajtak.in

Ways to clean a kitchen hood from grease and smoke without disassembly

Daily cooking leads to smoke and grease released during preparation making the inside of the kitchen hood very dirty and sticky. A thick layer of grease accumulates on the hood filters, which makes it difficult or cumbersome to remove or disassemble.

If you want to clean the hood without removing or disassembling it, you can use several simple home methods. This will save effort, and the hood will look brand new.

To begin, you need to prepare the ingredients: two tablespoons of caustic or baking soda, one tablespoon of vinegar or lemon juice, one cup of boiling hot water (in a large pot or cauldron), dish soap, an old brush, as well as a bucket or spray bottle.

For a quick cleaning, place a large pot under the hood, pour water, vinegar, and baking soda (or caustic soda) into it, and bring it to a boil. Then turn on the gas stove and set the hood to high speed. The steam from the boiling water, entering the hood, will help melt the stubborn greasy dirt that has built up over months, which will start dripping down.

Next, prepare a solution by mixing hot water, a little dish soap, and vinegar in a spray bottle. This solution must be thoroughly sprayed onto the filters and external parts of the hood, leaving it for 10–15 minutes to soften the grease.

After this, the internal and external surfaces of the hood should be carefully wiped with a damp cotton cloth or microfiber. For cleaning hard-to-reach places, you can use an old toothbrush. Finish the process by wiping the hood with a dry clean cloth so that it dries completely. In this way, the hood will become shiny without requiring disassembly or removal of parts.

Switch Cleaning Tips: How to Clean Dirty and Yellowed Panels Using Kitchen Products
Read more
www.aajtak.in

Switch Cleaning Tips: How to Clean Dirty and Yellowed Panels Using Kitchen Products

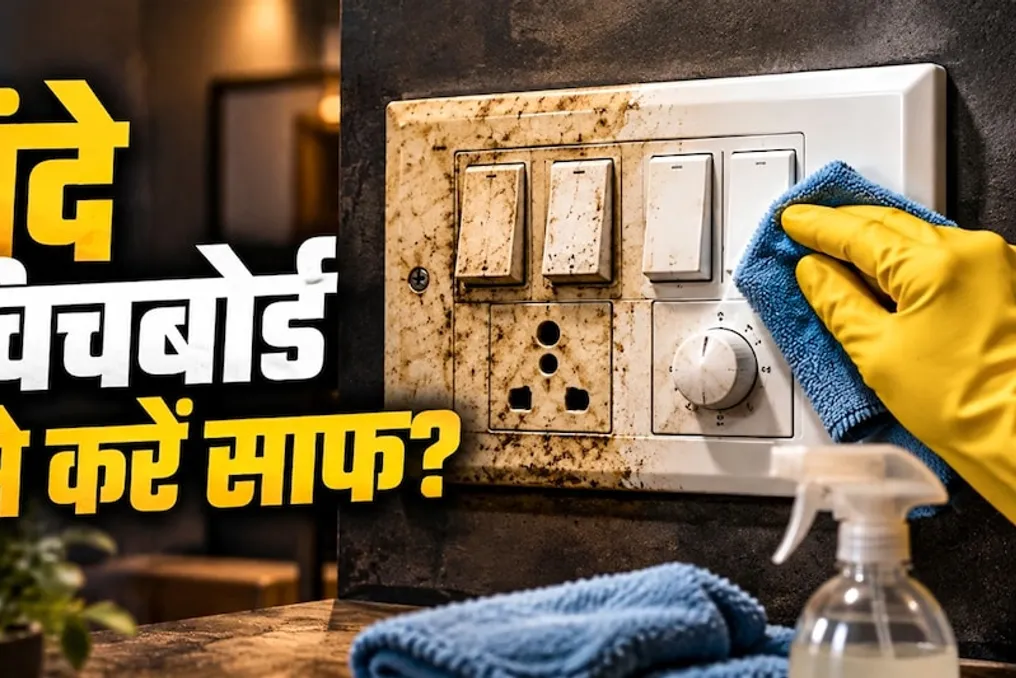
When cleaning the house, people often focus on the floor, kitchen, windows, and furniture; however, there is another item whose cleaning tends to be postponed—the wall switches. These switches, used daily to turn on lights, fans, and other electrical appliances, become dirty and yellow over time. They get particularly soiled near the kitchen, where dust mixes with grease and lubricant, making the surface sticky.

In such cases, many people buy expensive cleaning agents, whereas simple items found in the kitchen can be used for cleaning. With some kitchen ingredients, it is easy to restore dirty, yellowed, and dusty switches to their original appearance. Nevertheless, extreme caution must be observed when cleaning switches. Below are seven simple methods that will help remove dirt from the switches.

  1. Removing stubborn stains with baking soda: Baking soda is used not only for cooking but also for cleaning various items. It can easily clean switches. It can be applied to remove dirt around them. Mix it into a thick paste and gently rub the switch with a soft cloth or an old toothbrush. This will help eliminate accumulated dirt and restore shine.
  2. Cleaning grease with white vinegar: White vinegar has acidic properties capable of removing certain types of stains and grease. To clean a switch this way, dampen a cloth with a small amount of vinegar and then proceed with cleaning.
  3. Removing yellowing with lemon juice: Lemon juice is used to clean various stains in the home. Its acidic properties can help reduce stains on some surfaces. For light spots and yellowing, it is best to apply the juice to a cloth rather than applying it directly to the switch.
  4. Using salt: Salt can act as an abrasive. It helps separate ingrained dirt. Many use salt in combination with lemon or vinegar for cleaning.
  5. Dish soap: Dishwashing liquid, intended for washing dishes, can also help bring shine to switches. It is effective for removing grease and oil. A few drops of this agent diluted in water can be used to wipe the switch with a cloth.
  6. Toothpaste: Toothpaste is also included in the list of cleaning agents. It is used not only for teeth but also for cleaning. Gently rubbing the paste with a soft brush can reduce stains.
  7. Cornstarch: Cornstarch is capable of absorbing excess grease and dust. It can be used together with a dry cloth, especially if a lot of grease has accumulated on the switch.

When cleaning switches, it is necessary to ensure that the power supply is completely turned off. Simply flipping the switch does not guarantee a complete cessation of electricity supply. Therefore, before starting work, you should de-energize the line through the main switch or circuit breaker. It is strictly forbidden to apply water, vinegar, lemon juice, or any other liquids directly onto the switch. You must also not touch the switch with wet hands or clean it while the electricity is on. If dirt is found inside the panel, if it is loose, or if signs of burning are visible, you should call an electrician instead of cleaning it yourself.

Popular