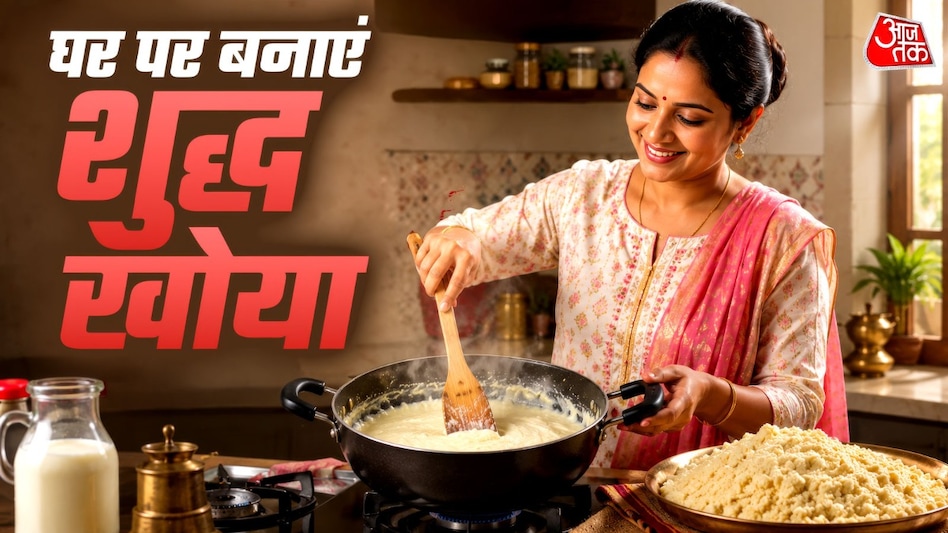
How to make fresh and pure mawa (khoya) at home for Navratri, avoiding store-bought mixes
Read more
Aaj Tak
www.aajtak.in

How to make fresh and pure mawa (khoya) at home for Navratri, avoiding store-bought mixes

With the approach of the Navratri season and festivals, the demand for mawa significantly increases. Taking advantage of this, markets begin actively selling counterfeit mawa containing starch and chemical additives. Consuming such low-quality mawa during sacred days and festivals not only harms health but also degrades the taste of sweets prepared for worship of the goddess.

If you plan to make peda, gujiya, coconut-mawa barfi, or halwa to offer to Mata Rani this Navratri, it is best to prepare clean, fresh, and granular khoya yourself instead of buying unsafe products from the market. Preparing this product is very simple, and with a little caution, you can achieve soft mawa comparable to what professional confectioners make. Below is the simplest instruction for preparing 100% pure khoya at home.

For preparation, you will need: 2 liters of whole milk (cow's milk or packaged whole milk), 1 teaspoon of ghee (for greasing the pan).

First, take a wide, thick-bottomed pot made of cast iron or aluminum. Apply 1 teaspoon of ghee evenly to the inner surface of the pot and add 2 tablespoons of water. This prevents the milk from sticking and burning to the bottom of the pot.

Next, pour 2 liters of whole milk into the pot. Set the heat to high and bring the milk to a boil. After boiling, reduce the heat to medium-high. Using a heavy spatula or ladle, constantly stir the milk, scraping it all the way to the bottom of the pot. The cream that collects around the edges of the pot should be removed and stirred back into the milk.

After about 20–25 minutes, the milk will have reduced in volume by half and will begin to thicken. At this point, the heat should be reduced to medium, continuing to stir continuously so that the milk does not curdle or burn on the bottom. After about 35–40 minutes, the milk will become granular and thick, resembling risotto. Then, for 5–7 minutes, it will fully thicken and start to gather into one mass, separating from the bottom of the pot.

When the mawa has completely thickened and begins to emit a light earthy aroma, turn off the gas. (It is important to remember that the pot remains hot even after turning off the gas, so continue stirring the mawa for another minute). Pour the finished khoya onto a plate to cool. After cooling, it will become even denser and more granular. Your 100% pure, fresh, and delicious khoya is ready! It can be stored in an airtight container in the refrigerator for 7–10 days.

If you are short on time, you can make quick instant mawa: mix 1 cup of milk powder with 1/2 cup of milk and 2 tablespoons of ghee, then fry over low heat for 5–7 minutes.

Similar stories

Recipe for Crispy Khachori with Green Beans, Served with Spicy Vegetable Ragout
Read more
www.aajtak.in

Recipe for Crispy Khachori with Green Beans, Served with Spicy Vegetable Ragout

If you are tired of monotonous food like simple dal and roti all week, then this weekend is a good time to prepare something special and aromatic. Regardless of the season or the desire for a special weekend breakfast, crispy khachori with green beans will be an ideal choice.

When the filling of fried beans, seasoned with asafoetida, fennel, green pepper, and other spices, is placed in a crispy semolina shell and fried, its aroma fills the entire house.

Serving these hot, spicy, and juicy khachori with rich potato ragout creates such a delight that it is impossible to stop. Below is a simple way to prepare khachori of restaurant quality.

For the khachori dough:

2 cups semolina (or 1 cup semolina + 1 cup wheat flour)

1/4 cup clarified butter or vegetable oil (for moina)

1/2 teaspoon ajwain

Salt to taste

Cold water (for kneading the dough)

For the bean filling:

1.5 cups green beans (fresh or frozen)

1 tablespoon oil

1/2 teaspoon asafoetida (hing)

1 teaspoon cumin (jeera)

1 tablespoon fennel (chopped)

1 tablespoon whole coriander (coarsely ground)

1-2 green peppers and 1 inch ginger (grated)

1 tablespoon chickpea flour (besan) (to absorb moisture and enhance flavor)

1/2 teaspoon turmeric and red pepper powder

1 teaspoon amchur powder and garam masala

Salt and black salt to taste

Oil for frying

Preparing the dough: In a bowl, mix the semolina, salt, ajwain, and moina oil. Rub well with your hands until the flour starts to form a lump. Then gradually add cold water and knead a soft and elastic dough. Cover it with a damp cotton cloth and leave it for 20 minutes.

Preparing the filling: Lightly crush the green beans in a blender without adding water to obtain a coarse crumble. Heat 1 tablespoon of oil in a pan. Sauté cumin, asafoetida, ground coriander, fennel, ginger, and green pepper. Add 1 tablespoon of chickpea flour and fry on low heat for one minute. Then stir in the crushed beans and all dry spices (turmeric, red pepper, amchur, garam masala, salt), frying for 4-5 minutes until the mixture dries out. Let the filling cool and form small balls.

Shaping the khachori: Take a piece of dough, stretch it at the edges to form a bowl shape. Place a ball of filling in the center and carefully seal the edges, thoroughly enclosing the filling. Press with your fingers to give the item a flat shape.

Frying: Heat the oil in the pan to a low or medium heat (the oil should not be too hot, otherwise the khachori will not become crispy). Place the khachori in and let them float gently. When they start to expand and take on a light golden color, increase the heat to medium and fry on both sides until a crispy and golden crust is achieved.

Serving: The finished, crispy, and hot khachori with green beans should be served with spicy and juicy potato ragout and green paste.

Popular