
How to make homemade blueberry jam: a recipe for a natural and healthy dessert
Read more
Aaj Tak
www.aajtak.in

How to make homemade blueberry jam: a recipe for a natural and healthy dessert

Eating jam for breakfast, whether with bread, toast, or paratha, is loved by both children and adults. However, store-bought canned jams often contain large amounts of refined sugar, artificial colors, chemical preservatives, and flavorings, which is extremely harmful to health. Therefore, it is recommended to avoid such additives and prepare 100% pure, hygienic, and tasty blueberry jam using fresh or frozen blueberries.

Blueberries are considered a superfood, rich in antioxidants and vitamins that help strengthen immunity in children and improve brain function. Making perfect and thick jam at home, without using pectin or chemical additives, is very simple.

The following ingredients will be needed: 2 cups of fresh or frozen blueberries; 3/4 cup of sugar (or Mishri/Desi Khand powder); 1 tablespoon of fresh lemon juice (which acts as a natural preservative and source of pectin); 1/2 teaspoon of ground cinnamon powder (optional, for a pleasant aroma).

First, thoroughly wash the fresh blueberries 2-3 times with clean water, and then drain them in a colander. Next, place the washed blueberries, sugar, and fresh lemon juice in a heavy pot or skillet.

Place the cookware on the stove over medium heat. The sugar will gradually melt, and the blueberries will begin to release juice. It is important to stir the mixture constantly with a spoon. When the blueberries become slightly soft, gently mash them with a masher or spatula to give the jam a pleasant texture with pieces.

Reduce the heat to low or medium and cook the mixture for 10-12 minutes until it thickens and develops a glossy appearance. If you are using cinnamon powder, add it at this stage. To check the readiness of the jam, drop a small amount onto a cold plate and tilt it slightly: if the drop does not spread but holds its shape, the jam is ready.

After that, turn off the heat and let the jam cool completely. It will become even thicker upon cooling. Store the finished jam in dry, sterilized glass jars in the refrigerator, and it will remain fresh for 2-3 months.

Similar stories

Recipe for Signature Sorghum Stuffed Paratha from Surat
Read more
www.aajtak.in

Recipe for Signature Sorghum Stuffed Paratha from Surat

Sorghum paratha with filling, which can be found on the streets of Surat, is very popular, and its taste differs from regular sorghum bread. If your children are reluctant to eat sorghum bread, you can make stuffed sorghum paratha at home. This recipe does not require much time and has a very good taste.

Gujarati cuisine, along with the cuisines of Rajasthan and Maharashtra, is very loved by people, and it is prepared using local spices. Usually, in the morning, most Indian households prepare parathas—sometimes simple ones, sometimes with potato and cabbage or with lentils. Although everyone makes wheat flour parathas, you may never have tried sorghum paratha.

In the city of Surat, Gujarat, they sell stuffed sorghum paratha that has an incredible taste. One such paratha can satisfy you, and it does not require much effort to prepare. Both children and adults enjoy eating it and will ask for it to be made again. Below is a method for preparing stuffed sorghum paratha at home.

Preparing the Dough

First, take sorghum flour into a bowl and add a little salt, then knead a soft dough with warm water. Sorghum flour does not hold together as easily as wheat flour, so add the water gradually and knead the dough thoroughly.

Preparing the Filling

After kneading the dough, to prepare the filling, mix finely chopped onion, green pepper, green coriander, ajwain, red pepper, coriander powder, turmeric, and salt in a bowl. It is advisable to add a little amchur powder to make the taste more tangy.

Shaping and Frying

Take a firm ball of dough and gently flatten it with your hands. Place the prepared filling in the center, close the edges, and form it into a round shape again. Carefully give it the shape of a paratha by pressing lightly. Since sorghum flour can crumble, roll it very carefully; if possible, form the paratha by slowly pressing with your palm.

Heat a skillet and place the prepared sorghum paratha on it. After it lightly browns on both sides, brush it with a little oil and fry well. When the paratha becomes golden and crispy on both sides, remove it from the skillet.

What to Serve With?

Hot stuffed sorghum paratha is recommended to be served with yogurt, green chutney, pickles, or butter. If you are making it for children, you can add cheese to the filling to provide them with extra protein.

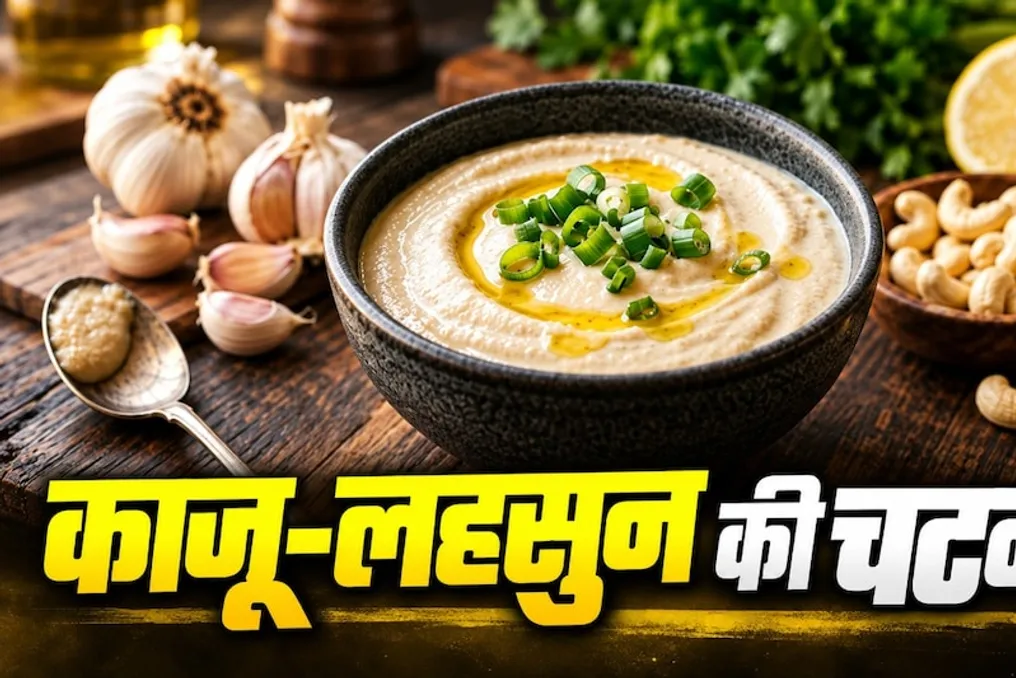
Cashew and Garlic Creamy Paste Recipe: Make it at Home to Serve with Paratha or Burger
Read more
www.aajtak.in

Cashew and Garlic Creamy Paste Recipe: Make it at Home to Serve with Paratha or Burger

Traditionally, marinated vegetables, chutneys, and papads are consumed with meals because the side dish plays an important role. Sometimes the taste of dal or vegetable dishes may not be very pleasant, and in such cases, chutney helps enhance the flavor. Although everyone makes chutney from cilantro, mint, seeds, tomatoes, and onions, it is worth trying homemade cashew and garlic paste. Its creamy texture is very pleasant, and it can be served with snacks, salads, sandwiches, or other favorite dishes, which is preferable to buying a ready-made product in the store. Furthermore, preparing this special paste requires not many ingredients.

Cashew and Garlic Paste Recipe:

To begin making the cashew and garlic paste, you need to prepare the cashews. Raw cashews should be soaked in water for at least 4 hours; they can also be soaked for 8–12 hours.

How to Make Cashew and Garlic Paste

After soaking, drain the cashews and rinse them thoroughly with clean water. Then, place the soaked cashews into a food processor or a powerful blender. Initially, add only half a clove of garlic, along with extra virgin olive oil, lemon juice, green onion, sea salt, and a little honey or maple syrup.

Next, add about a quarter cup of water and blend at high speed until an absolutely smooth and creamy consistency is achieved. If the mixture seems too thick, gradually add the remaining water. It is important to ensure that the paste is neither too thick nor too thin.

Once the paste is blended, taste it and adjust the flavor if necessary by adding a little salt or lemon juice. If you prefer a stronger garlic flavor, you can add the remaining half clove of garlic and blend again. Thus, the homemade cashew and garlic paste is ready.

Chef Vikas Khanna Shares Recipe for Making Pav Bhaji Spices at Home
Read more
www.aajtak.in

Chef Vikas Khanna Shares Recipe for Making Pav Bhaji Spices at Home

When people hear about Pav Bhaji, they recall the hot dishes and buns fried in oil that are served on the streets of Mumbai. Although it is a famous dish of Maharashtra, it is popular not only in Mumbai but also in Delhi, UP, and other regions of the country.

Nevertheless, complaints often arise about homemade Pav Bhaji because it does not possess the same aroma and taste as in commercial establishments. One reason for this may be the spices used. Renowned chef Vikas Khanna has shared a method for preparing Pav Bhaji masala, which is easy to make at home, and adding this mixture significantly improves the taste and aroma of the dish.

Pav Bhaji Masala Powder Recipe:

To create Pav Bhaji masala, you first need to remove the seeds and stems from dried red chilies. Then, lightly fry them on a hot pan, taking care not to overcook or let them burn, as burnt chili will give the spices a bitter taste.

In a second tray, roast whole spices: cumin, cloves, coriander seeds, cardamom, black cardamom, and cinnamon over low heat until they release their aroma. After this, let the roasted whole spices and dried red chilies cool slightly. Place them in a food processor along with turmeric, amchur powder, black pepper, red chili powder, and black salt.

Grind all ingredients thoroughly into a fine powder; if a coarser grind is preferred, you can avoid grinding them too finely.

How to Use It in the Dish?

When making Pav Bhaji at home, after mashing the vegetables, you need to add this spice mix in the required amount and mix well. Heating the spices together with the Pav Bhaji for some time allows all aromas and flavors to fully combine. Thus, the freshly prepared spice mix can give your Pav Bhaji a richer and more pungent taste.

Popular